
Anyway, to the cuffs! They're based on the cuffs on this riding habit at the V&A. Mine are a little shorter, but as I am a shrimp, I tend to downscale things a bit so they look a little more in proportion on me.
It took me a while to decide what style cuff I wanted, but kept coming back to this one. It is, after all, the picture that made me start thinking of a linen riding habit. Although it's wool, the close up nature of the picture gives it that linen-y look--at least to me!
As as side note, in my copy of Fashion in Detail from the 17th and 18th Centuries, the buttons and lining are a bright yellow that contrasts rather prettily with the brown wool. This made me quite happy as I was looking for documentation for the blue buttons I very much wanted. I have since found a man's jacket in black with a yellow waistcoat and yellow buttonholes in Modes en miroir. This one also made me happy because the buttonholes look just like mine. See below for what I mean!
And, now really on to the cuffs!
I made these cuffs just from pictures, but fortunately from very good pictures. I think that if I don't have them done completely right, they're at least very close to right. All the techniques I used--edge stitching, top stitching--are known period techniques!

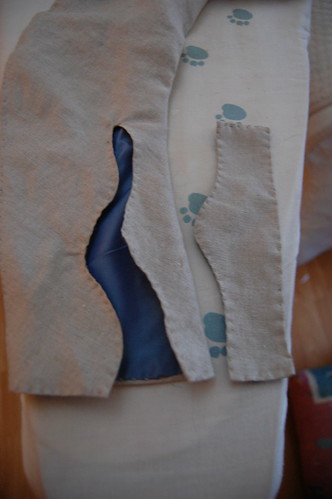
Start with a finished sleeve. With a piece of paper sketch the shape of the cuff.
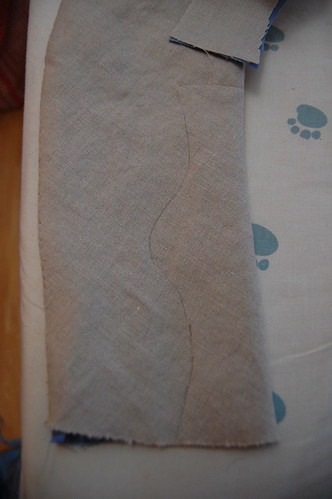
Trace that onto your sleeve. You don't need to trace the top edge like I did!
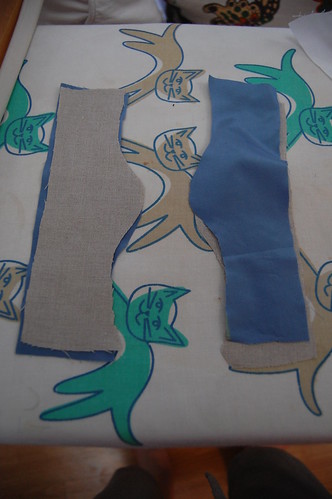
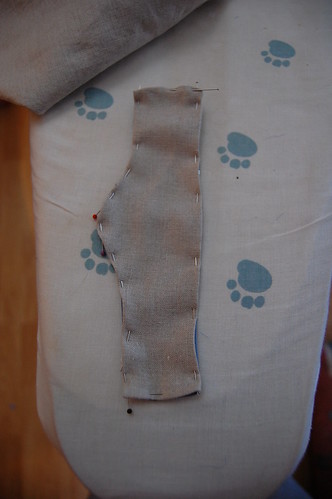
Use the same pattern to cut the inserts. I made them just a little longer so I could be sure they'd fit into the finished cuff. It's much easier to hem a little more than to start over!
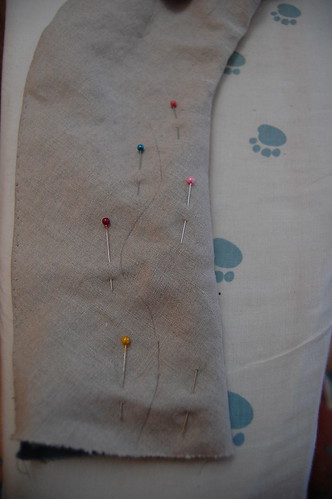
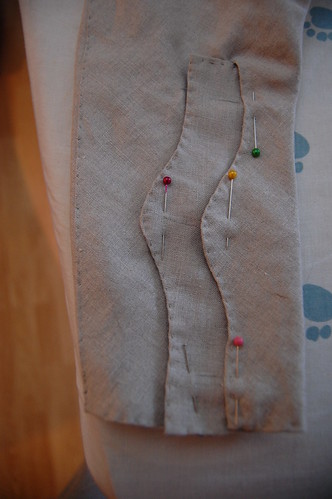
Pin around your cutting line. This is to keep the fabrics from shifting. Erase your top line if necessary :)
Take a deep breath and cut!
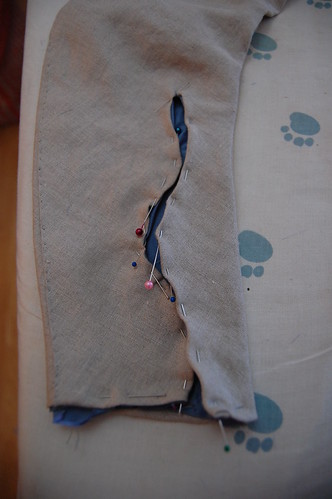
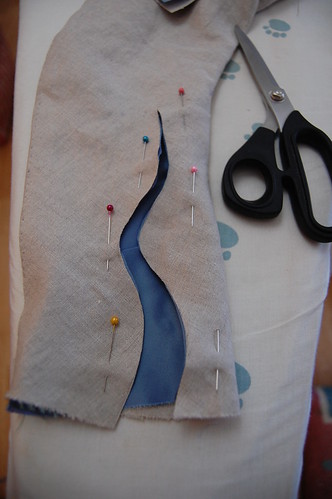
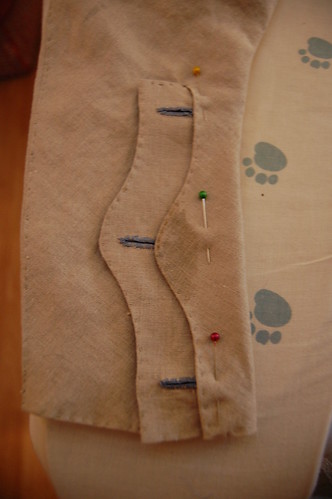
This part is rather annoying and fiddly. Turn the seam allowances under to prepare for edge stitching.
Repeat for the insert.
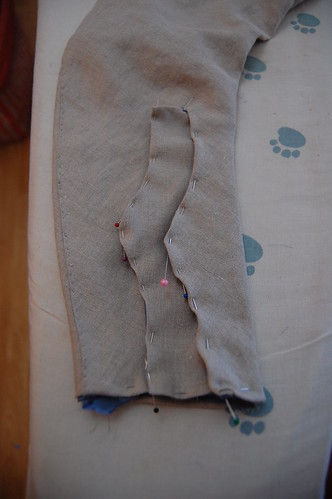
Test your insert! It's at the not very annoying to fix stage now :)
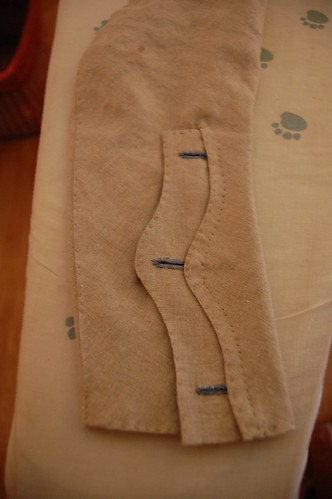
Edge stitch the pieces together. I chose to use point a rabbatre sous la main because it appears to have been used on the part of the cuff you can see. The outside is topstitched and the inside is whipstitched.
Here's a video I made about this:
18th Century Edging Stitch from Katherine on Vimeo.
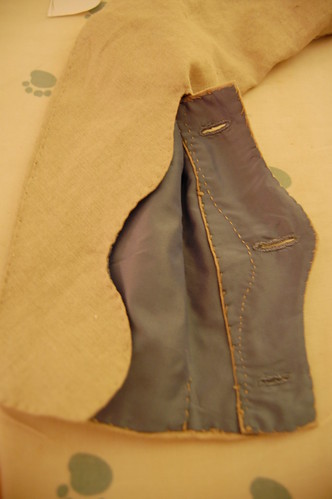
Pin the insert in and mark the buttonholes.
Make the buttonholes. Press everything neatly. Get the cuff so wet you can't iron it dry. Oops :)
Yes, my buttonholes are far from perfect. I can't seem to get any stitch that actually touches to look perfect. Hence my great love of the spaced backstitch and tambour embroidery. But buttonholes, embroidery, backstitches, they're all off for me. I blame the same thing that makes it near impossible for me to write neatly. After all the hand sewing practice I've had, you'd think this wouldn't be an issue! Needless to say, I'm *very* nervous about the false buttonholes down the front of the jacket, but I think those will be much better since they're not cut.
Sew the cuff in. I used a spaced backstitch as it's my best looking stitch.
And from the inside--I actually love the way this looks :)
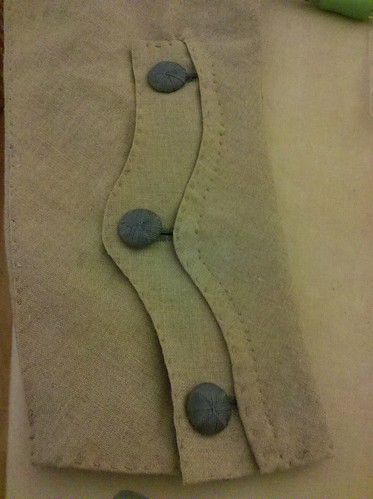
And the nearly finished cuff! The buttons are just placed there for effect.
That's a really neat cuff! I like the color combinations you picked out.
ReplyDeleteGreat tutorial! Thanks for sharing!
ReplyDelete...and that's really a cute iron board cover:)
Sabine
Gorgeous! I can't wait to see the whole thing. I have that habit too, of not wanting to post until the whole thing is complete, then loosing interest once the garment is done.
ReplyDeleteWhat a beautiful, neat cuff! Thanks for sharing.
ReplyDeleteThank you so much for posting this.
ReplyDeleteI have been searching the Web for hours just to find the name of this cuff style. I have seen it done on some modern garments but nobody had the proper name for it.
Anyhow I came across your wonderfully detailed & skillfully constructed garment blog and my research has come to a very happy end.
Once again thank you.
P.S: Those buttons are exquisite.